Showing posts with label Dressings/Condiments. Show all posts

5/9/14

Edamame Hummus

Mother's Day is this coming Sunday, and to celebrate I'm posting kid friendly recipes all week. I may be alone in this, but sometimes I have trouble figuring out different healthy(ish) options to serve my toddler, especially easy lunch recipes, and my idea of celebrating mothers is to have five new easy recipe options. Happy Mother's Day!


I know this might be a stretch calling this a kid friendly food for some kids, but my daughter loves it so much I decided to include it in this week's roundup of kid friendly lunches/snacks. My daughter loves dips, and hummus is a favorite. She likes the hummus so much that by the end of the meal she has given up on the carrots or pitas that I've given her to scoop it up and has resorted to using her fingers and eating the hummus plain. I should probably mention at this point that my daughter is a weirdo. 

Anyway, I thought I'd make a dip that was a little healthier since she was eating it as a meal, and this edamame hummus is what I came up with. I should state that yes, I know that without chickpeas hummus technically isn't hummus, especially since this recipe doesn't use tahini, but it is much easier to call it hummus than "Pureed Edamame with Middle Eastern Flavors".  I decided to use edamame as the base of the dip instead of chickpeas because of the higher protein content and increased vitamins in edamame, but chickpeas are also a healthy choice that you could use in this recipe if you prefer. I also didn't use tahini in this hummus because I wanted a more mild flavor. To get back a little of the sesame flavor it adds, though, I used some sesame oil in the place of half the olive oil. The edamame hummus is as easy to make as throwing ingredients in a food processor and turning it on, and it makes a snack or lunch that I am just as happy to eat as my daughter. And given that some days I only have time to make myself a peanut butter sandwich for lunch while I'm making one for my daughter, that is a very good thing.


Edamame Hummus

Heat Oven To 350 Published 05/09/2014
Edamame Hummus

Ingredients

  • 1 cup shelled edamame (thawed if frozen)
  • 1/2 tablespoon sesame oil
  • 1/2 tablespoon olive oil
  • 1/2 tablespoon ground cumin
  • 1/2 tablespoon lemon juice
  • 1 clove garlic, minced
  • 1/4 teaspoon table salt plus more to taste
  • 1/3 cup water

Instructions

  1. Add all ingredients except water to a food processor and process, scraping down the sides as needed, until edamame are coarsely chopped.
  2. Add water, 1 tablespoon at a time, processing after each addition, until the edamame mixture forms a smooth paste of the desired thickness. Add salt to taste. (I usually add about 1/8 teaspoon or so)
  3. Refrigerate 30 min and serve.
Yield: 3/4 cups
Prep Time: 7 mins.
Cook time: None
Total time: 7 mins.
Recipe Source: HeatOvenTo350

1/31/12

Creamy Cheddar Spread


Do you have a favorite kind of cheese?

I know, it's a tough choice. There are so many good ones, how could you even narrow it down? Brie is so soft and rich, it just makes me feel special when I eat it. Blue cheese has its place in my kitchen, and a little goat cheese can add such great flavor to dishes, especially salads. Then there's all the jacks, and the sandwich favorites, and so on.
If I had a to chose a favorite, though, I'd go with cheddar. Some good, sharp cheddar, preferably made in Vermont. (Even if I weren't required by law to say that because I grew up in Vermont, I still would. Vermont makes good cheese. And ice cream.) I love cheddar for it's flavor, its texture, its versatility, even for how well it pairs with fruit. (I don't know if you've noticed on this site, but I kind of like to put fruit in everything.)

If you are a cheddar fan like me, then this dip is for you. Sharp and salty, it is easy to make and goes with just about everything that cheddar goes with.

Which is just about everything when you think of it.

I like it on apples and pears because I like the sweet/salty flavor combination, but you could spread some on sourdough, crackers, or even tortilla chips. It's like a fancy Easy Cheese that tastes like cheese and doesn't come in a can.

Word is that there is a certain large sporting event coming up this weekend, and this would be a great alternative to the regular herb/sour cream dip. Or in addition to it. Both are so fast to prep, why should you even have to choose? 


Creamy Cheddar Spread

Ingredients
  • 8 ounces Extra Sharp Cheddar Cheese, grated (about 2 cups) (Depending on your tastes, you might want plain Sharp or even Mild Cheddar. Also, I haven't tried pre-grated cheese and I think the anti-caking coating on it might affect the creaminess of the final spread.)
  • 1/4 cup sour cream
  • 2 tablespoons salted butter, cut into small pieces
  • 2 tablespoons white wine or apple juice
  • 1 Large pinch ground mace or nutmeg (optional. Good with fruit)
  • 1 Pinch ground red pepper (cayenne)

Directions

  1. In food processor, combine all ingredients; process until smooth. (Alternatively, use electric mixer to blend ingredients; spread will have coarser texture.) Serve with whole-grain crackers, rounds of French bread or slices of fresh apple and pear. Note: The spread will be creamy and soft when you first make it. If you decide to make it ahead of time and refrigerate it, the consistency will get thicker. You can re-blend it if you would like it soft again. I usually don't bother.
Prep Time: 5 min Serves: 4-6
Recipe Source: Cabot Cheese Coop (http://www.cabotcheese.coop/)

9/28/11

Homemade Bouillon


I'm a list shopper when it comes to buying groceries. My mind goes blank when I walk into a grocery store and I forget all about the great meal plan I made just that morning. Add to that the fact that I only go grocery shopping once a week and it makes a "no list" scenario really ugly. Ugly as in, "Sorry babe, but we're eating old cornflakes with diluted cream for breakfast for the next few days" ugly.
Despite my diligence in using a list, though, there are a few ingredients I can never remember to buy. For some reason, the words "chicken broth" are invisible to me when on a grocery list. I skip right over them every time and come home without a single can. After multiple last-minute trips to the grocery store to buy more broth for a soup already in progress or rice or whatever I happen to be cooking, I finally broke down and starting buying some bouillon-type paste that can be used to reconstitute broth in a pinch. It's not my favorite solution since I cringe sometimes when I read the ingredient list, so I finally decided to try making my own emergency bouillon.
As with many great kitchen adventures at my house, this one began with a google search. A couple methods to make your own bouillon involved boiling down chicken stock to a very concentrated, syrup-like form. If you are looking for a meaty flavor in your bouillon, this might be the route you would want to take. Since most of the time I just need a little flavor to be added to a soup or other food, it isn't essential for me to have chicken flavor in my back-up bouillon. 

Also, I'm lazy.


The recipe that finally caught my eye was from The River Cottage Preserves Handbook as seen on 101Cookbooks. It appealed to my laziness because all you do is chop things up in a food processor and you are done. The original recipe had a fairly long ingredient list that included things like celery root and fennel. Since the purpose of this bouillon was to eliminate trips to the store and not add them, I decided to simplify it a bit and just include ingredients that I like. If you decide to make this at home, feel free to modify it to fit your tastes. It also a great way to us up extra vegetables or herbs that you might have around. I would just advise against using anything too distinctly flavored, such as garlic, so that your finished bouillon will be more versatile. Then again, if you put garlic in just about everything, you might want to add it. 
The finished product from spending a few minutes of stuffing veggies of your choice into the food processor is a paste-type mixture that you can use to replace bouillon in recipes that call for it. When I want to use it as stock, I add 1 tsp per cup of water. You will likely still need to add salt to taste, despite how much salt is in the bouillon recipe. Also, I should warn you that you must not, under any circumstances, taste the bouillon plain. Trust me on this. You and your tongue will regret it for about five minutes. If you are a habitual taster (which is a good thing, usually) you should dilute it in some hot water and adjust your seasoning from there. Due to the same high salt content that makes it impossible to eat plain, you can store it in the freezer and it won't solidify, making it easy to scoop out a teaspoon or two when you need it. 

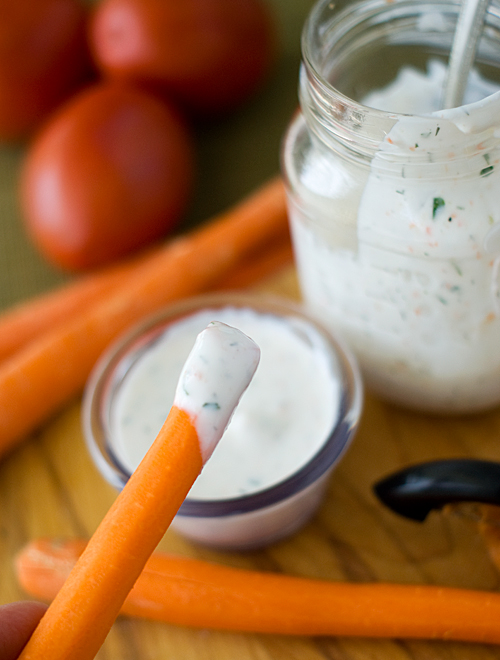
As I said before, this bouillon won't give a meaty flavor to your food so this won't work for all recipes. I've found that it works well for foods where the bouillon can be cooked for a good amount of time before serving, such as in soups, some pasta dishes and slow cooked food. It also makes a killer ranch dressing, which I'm sharing the recipe for as well. In fact, with how easy this is to make, I'd say it is worth making it for the ranch dressing alone.

 Just don't forget to buy the lettuce when you are at the store. 


Homemade Bouillon Substitute

Ingredients:

1 lb carrots, peeled
8 oz (about 1/2 bunch) celery
8 oz onion (one medium)
3/4 cup salt
1/2 bunch cilantro
1 bunch parsley

Add the carrots, celery and onion to the food processor and pulse about twenty times. Stir the chopped vegetables to get the larger pieces to the bottom, add the salt and pulse a few more times. Add the cilantro and parsley and pulse until the mixture is finely chopped and forming a loose paste, stirring as necessary to get larger pieces to the bottom to be chopped. Store in the fridge for up to a week or the freezer for two months. Makes about 3 1/2 cups.

Recipe Source: adapted from 101Cookbooks.com


Homemade Ranch Dressing

Ingredients:

1/2 cup low-fat sour cream
1/4 cup buttermilk
1 1/2 - 2 tsp homemade bouillon (depending on how salty your bouillon is)
1/8 tsp dried dillweed
1/8 tsp garlic powder (fresh garlic works, too, but I find it is harder to get it evenly distributed in the dressing.)
1/8 tsp fresh pepper

In a small bowl, whisk together the ingredients. Add salt and pepper and more bouillon to taste. Adjust consistency with additional buttermilk or sour cream. Makes about 1 cup dressing. 


1/31/11

Red Pepper Jelly


If you're anything like me before I tried pepper jelly, you are probably thinking it sounds really gross. What business do red pepper have in something like jelly? That job should be filled by fruits like strawberries and raspberries, maybe mixed berries for those adventurous folks. But red peppers? I wasn't so sure.

Well, this past Christmas when my husband and I were at my parents house there was a jam sampler that was given to my mom by a friend. Of course one of those jellies was red pepper jelly. (Otherwise this is going to be a very long tangent.) The great plague of Christmas 2010 hit our family a few days after Christmas and half of us were avoiding most foods for the better part of a week because we were worried they'd make a reappearance later in the day. New Years Eve rolled around and my ingenious mom, instead of slaving over a fancy meal that half of us wouldn't have enjoyed, decided to do things simple. We'd have crackers, cheese and all kinds of jam for dinner. Everyone could just eat whatever they could digest. It turned out to be a lot of fun making different combinations of crackers, cheese varieties and jam flavors.

Feeling brave, (I was mostly over the flu by this time) I tried out the red pepper jelly on a cracker with some cheese. And - no surprise here or this post wouldn't exist - it was really good. In fact, it was probably my favorite thing I ate that night. It was sweet and a little hot and on cheese it tasted somewhat like pepper jack. It was such a pleasant suprise. I've thought about it several times since flew back home and decided to make a batch of red pepper jelly myself. I'm sure they sell the stuff in stores, but that's not how I roll. Plus, specialty jellies are expensive and a red pepper is relatively cheap. Or at least that's what I tell myself when I feel the urge to cook something that could easily be bought. I searched through different recipes and decided on this one because it made a small batch, which means it's less cooking time, less money spent on ingredients and less sticky jam to clean off of everything in the kitchen since I cannot be neat when making jam. It still makes plenty to eat yourself or share with a friend, and freezes well if you don't feel like going through the trouble of canning it. I was happy when I tasted it and discovered that it is every bit as delicious as the jarred kind I first fell in love with on New Year's Eve. It's delicious on a cracker or triscuit with cheese or cream cheese, on toast, as a dipping sauce for chicken nuggets or a number of other things you'll be thinking up once you make this and become addicted to it.


Red Pepper Jelly

3  fresh jalapeño peppers, seeded and coarsely chopped
1/2  red bell pepper, coarsely chopped
3  cups  sugar
1/2  cup  cider vinegar
1/2  (6-ounce) package liquid fruit pectin
2  tablespoons  fresh lime juice

1. Process jalapeño and bell peppers in a food processor until smooth.

2. Combine pepper puree, sugar, and vinegar in a nonaluminum saucepan. Bring to a boil over medium-high heat, stirring constantly. Boil 3 minutes; stir in pectin and lime juice. Boil, stirring constantly, 1 minute. Remove from heat, and skim off foam with a metal spoon.

3. Pour into hot, sterilized jars, filling to 1/4 inch from top; wipe jar rims. (If you prefer, you can strain the jam through several layers of cheesecloth to make the jelly clear. You can also add a couple drops of red food coloring to make the color more intense.) Cover at once with metal lids, and screw on bands; cool. Store in refrigerator or freezer.

Yield: about 3 half-pint jars

Recipe Source: adapted from Southern Living


1/12/11

Roasted Tomatillo Salsa


I classify this as a winter dish because it is roasted in the oven, and who wants to turn the oven on during the summer? (The answer is: NOT ME.) This recipe uses tomatillos, which are those little green tomato-like things wearing a leaf-ish husk that are sold near the peppers at the grocery store. When you buy tomatillos you want to find firm ones that are bright green with no dark spots and no mold or mildew on the husks. Remove the husks before using, and wash them with water to remove a thin, sticky residue that they have on their skins. Tomatillos have a slightly sour or bitter flavor and taste great roasted like this recipe requires. I don't notice a big difference in flavor whether I buy them in the winter or fresh from the farmers market, so tomatillo salsa is a great mid-winter salsa to make when all fresh tomatoes look pale pink and taste like mushy cardboard. It isn't a very hot salsa, so if you prefer things on the spicier side you might want to add a couple more hot peppers. Oh, and I did I mention that there's hardly any chopping?


Roasted Tomatillo Salsa

Ingredients:

1 pound tomatillos (about 6 large), papery husks removed, rinsed
1/2 large onion, cut into thirds
2 serrano chiles, halved, seeded
1 tablespoon olive oil
1/2 teaspoon salt
1 cup (loosely packed) fresh cilantro leaves

Directions:

Preheat oven to 375°F. Toss first 5 ingredients in 8x8x2-inch glass baking dish. Roast in oven until tomatillos and onion are very soft, about 1 hour. Transfer contents of baking dish to processor and add cilantro. Puree until almost smooth. Transfer salsa to bowl. Season to taste with more salt, if needed. Chill or serve at room temperature. 

Recipe Source: Bon Appetit, April 2008


12/7/10

Creme Fraiche


Creme fraiche is french for "delicious thick creme stuff that tastes amazing." That may not be a direct translation, but it's pretty close in my mind. It's great as a thickener in soups, in sauces, and even just poured over fresh fruit. It has a creamy, slightly sour (but not as much as sour cream), slightly nutty flavor. A small container at the grocery store will cost you your firstborn child (If you can even find it. The creme fraiche, that is. Not your firstborn.) but it's really easy to make your own. So easy, in fact, that you'll soon be looking for excuses to use it. And if you do use it enough, then you'll automatically have all kinds of excuses to hit the gym, too. Win-win.


Creme Fraiche

1 cup heavy whipping creme
2 T cultured buttermilk

Those are the two ingredients. Stir them together in a clean glass jar and cover. Let sit at room temperature for 8-24 hours*, or until thickened. Stir well and store in the refrigerator. The flavor will develop as the mixture ages. Use within 10 days.


*I know, you're thinking that leaving the heavy cream out of the counter for a day is crazy, but you really won't die after eating this stuff. The bacteria in the buttermilk out-compete other bacteria that would make you sick.

9/9/10

Heavenly Refried Beans


I know the title leaves you wondering if it's true that you could really find Refried beans that taste like heaven without adding a pound of straight up lard?!? Well folks I tried this recipe about two years ago and I will NOT serve a mexican meal without having this on my table. The secret: Cream Cheese! Well I thought it was just me and my husband that really enjoyed it- until we were visiting my family in Utah and they actually requested that I make this. So here's the deal--it's the easiest thing you'll ever make and once you read how it's made, you'll never have to refer to the actual recipe again b/c it's just THAT easy--BUT I've had people ask for the recipe, so I figured I'd just post it and let you go for it!


Heavenly Refried Beans

1 can of your favorite Refried Beans (Here in MN I get the Referido Zesty Salsa)
4 ounces Cream Cheese (You can cut down calories and use the 1/3 less fat but DO NOT use fat free--trust me!!)
2 tablespoons Scallions, chopped (for sprinkling on top)
Cheddar Cheese--(for sprinkling on top)
2 tablespoons tomatoes, diced (for sprinkling on top)

1. Combine the refried beans and cream cheese in a medium saucepan (or a microwaveable bowl if you choose to nuke it)
2. Warm up until the cheese and the beans are smooth and hot (do NOT bring to a glumpy boil)
3. Pour in a bowl and garnish with scallions, cheese and tomatoes.
4. Serve by itself or with chips.

8/17/10

Guacamole

Is there anything better than guacamole and chips? Or guacamole and anything? My husband and I have been known to mash a few avocados, add some pepper and salt, throw in some tortilla chips and call it dinner. Can you tell we don't have kids yet? This recipe is one I use when I make guacamole to bring anywhere. It originates from my brother's childhood friend, who grew up to be a real live chef at a fancy schmancy restaurant. He made dinner for my brother's family when they were visiting once and my brother diligently wrote down how he made everything, including the guacamole. I'm thankful he was persistent in getting the amounts that his friend was just throwing together to taste because I could never have recreated this recipe without them. It makes a sizable batch of guacamole, probably enough for five or six people, but I nearly always double it because it goes that fast.

To start out with, you need some nice, ripe avocados.


Cut them in half and use a spoon to scoop out all their deliciousness into a bowl.

Add about 1/4 cup of chopped cilantro to the avocados and mash them together. Even if you are a cilantro hater, don't cut it out of this recipe. It really adds something and doesn't overpower the guacamole. In fact, I'd say this recipe was a major part of why I went from a cilantro hater to cilantro lover.


Add some sour cream, lime juice, salt, black pepper and minced grilled red onions. If I'm not grilling something, I usually cook a slice of red onions in a pan or broil it. The point is just to tame it a bit so it's not so strong and overpowering.

Now, add some heat. I love this recipe because there's no chopping hot peppers and wearing gloves to keep from getting the spicy oils on your hands and trying not to touch your eyes and forgetting and ending up with stinging, burning eyes and pockets of extreme spiciness in the guacamole because you didn't chop the peppers small enough. Nope. Just add some of this:


Be careful, though. It's really spicy. I always add less than I think I need and then add a few drops at a time until it's the right heat for me.

Stir it together, and put it on everything you can think of.

Justin's Guacamole
1/4 cup cilantro, minced
3 avocados
1 tsp kosher salt
1/4 tsp black pepper
2 rings grilled onions, minced
1 T lime juice
1/2 cup sour cream
1/4-1/2 tsp sriracha chili sauce

Mash the cilantro with the avocados. Add the other ingredients and stir together.  

8/1/10

Cilantro Lime Creamy Dressing


I always wonder what it is about cilantro that you either LOVE it, or HATE it. I am one of those people that could have cilantro on everything, and never tire of it. My husband on the other hand, gags at even the mere sight of the green leafy herb. So in our house cilantro is always a side garnish, unless if of course, you found a wonderfully fresh and delicious creamy dressing, which I have. Don't act surprised, I found it on ourbestbites.com. It's the kind of dressing that literally lights your mouth on fire. The earthy fresh taste of the cilantro combined with the fresh lemon zest....my mouth is watering just thinking about it. So enjoy!


Cilantro Lime Creamy Dressing

1 Envelope Hidden Valley Ranch Dressing Mix
1 cup Mayo
1/2 cup Milk
1 Lime squeezed to amount to about 2 tablespoons
2 Garlic Cloves, roughly chopped
1/2 cup Cilantro, roughly chopped
1/4 cup Green Salsa
hot sauce to taste

It really is one of the easiest dressings that you'll ever make! That's why I'm not doing a "play-by-play" with pictures. Just throw literally everything in a blender (or a food processor) and mix it up. With the hot sauce, add that in the end and just add a few drops at a time. My first batch I was feeling "sassy" and added waaay too much!
Poor over any salad, use as a dipping sauce for tacos, or for a simple dip with chips.

 
Pin It button on image hover